
Pointing a Wyze camera through a window is one of the most practical ways to add outdoor coverage without touching your siding, running weatherproof cable, or dealing with any of the headaches that come with a true exterior install. No drilling, no silicone, no worrying about your warranty. You just set it up on the inside of the glass and let it watch the outside — simple in theory, but a little tricky in practice if you use the wrong camera or skip a few key settings.
The good news is that Wyze has made this significantly easier over the past couple of years. The traditional approach of pressing a Wyze Cam v3 or V4 against the glass with IR night vision turned off still works well with the right adjustments. But in November 2025, Wyze launched a camera built from scratch for exactly this use case: the Wyze Window Cam. It eliminates the IR LEDs that cause glare, uses a wide-aperture lens optimized for shooting through glass in low light, and ships with an adhesive mount that sticks directly to the window. For most people buying a camera specifically for window use, it’s the obvious starting point now and not an afterthought.
This guide covers both options in detail so you can figure out which approach makes sense for your setup.
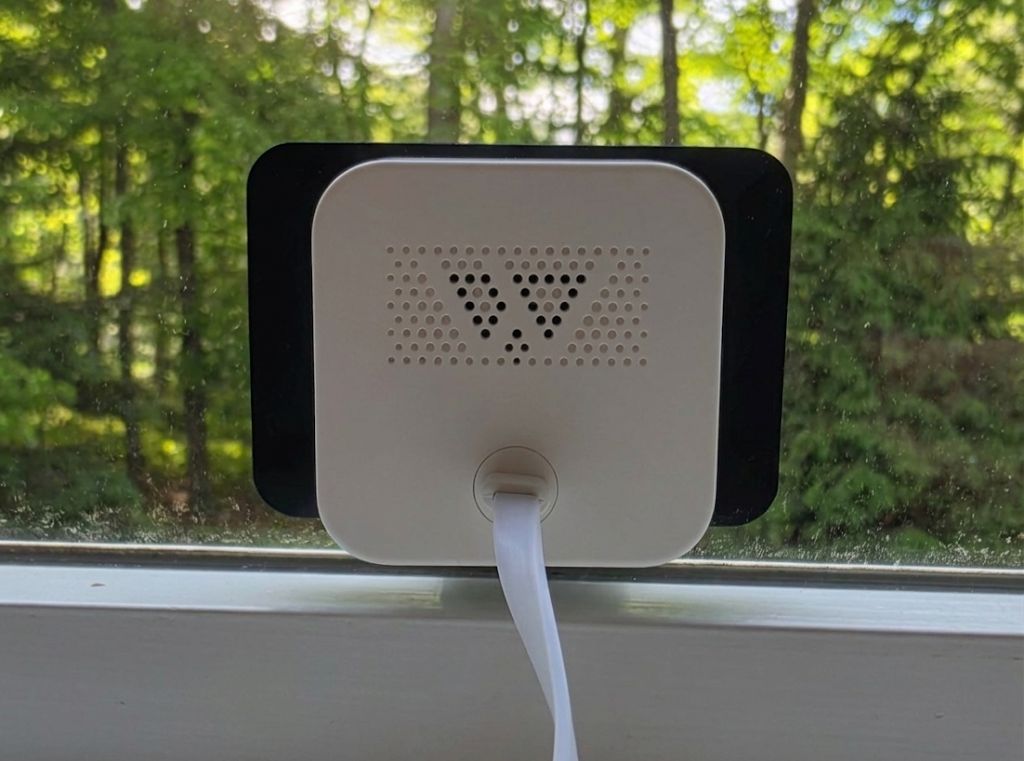
Option 1: The Wyze Window Cam (Best Choice for New Buyers)
The Wyze Window Cam is purpose-built for this installation, and you can tell Wyze actually thought it through rather than just slapping a mount in the box.
The biggest change from a standard Wyze camera is what they took out: the IR LEDs and spotlight are completely gone. On a typical camera, those IR emitters are exactly what create the nasty white glare you see when you aim it through glass at night — the infrared light bounces off the pane and floods your footage. The Window Cam sidesteps the problem entirely by removing the hardware that causes it.
To compensate for the loss of IR illumination, Wyze fitted the camera with an f/1.0 aperture lens — unusually wide for a camera in this price range — paired with a BSI (backside-illuminated) sensor. Together, those two components let the camera capture significantly more light than a standard lens, which means it can produce color footage at night using only ambient light sources like streetlights, porch lights, or passing headlights. You don’t need IR to see in the dark through a window. You just need a camera that’s actually designed to work that way.
Installation
Setup is genuinely straightforward. A nylon fastener strip adheres to the inside surface of the glass — clean the glass first, peel the backing, press it on, and give it a few minutes to set. The camera attaches to the strip magnetically via a matching fastener on its back. That’s the whole mount. No screws, no brackets, nothing permanent.
A 10-foot micro-USB cable runs from the camera to a nearby outlet, and Wyze includes adhesive cable clips to keep the run tidy along the window frame or baseboard. The whole process from unboxing to live view typically takes under ten minutes.
One small but genuinely thoughtful detail: Wyze includes two mounting stickers in the box, not just one. Since the adhesive is single-use, having a backup in case your first placement isn’t quite right is actually useful — most manufacturers would make you buy a replacement kit.
| Spec | Wyze Window Cam |
|---|---|
| Resolution | 1080p HD |
| Aperture | f/1.0 (wide — maximizes ambient light) |
| Field of View | 120° |
| Night Vision | Color only — no IR LEDs |
| Storage | microSD up to 512GB |
| Mount | Nylon fastener — sticks to glass, no tools |
| Cable | 10ft micro-USB included |
| Price | ~$35 |
A Few Things to Know Before You Buy
The Window Cam has no tilt or swivel once it’s mounted. It points straight out from wherever the sticker lands, so the angle is entirely determined by where on the glass you place it. In most cases this isn’t a problem — you can usually position the camera on the glass to capture the view you want — but it’s worth doing a dry run with the camera held in place before you commit the adhesive. Think about what you actually want to see in the frame (driveway, front walk, gate, street) and make sure the placement delivers that before you peel anything.
The other limitation to know upfront: screened windows won’t work. Wyze explicitly calls this out, and it makes sense — the screen introduces a mesh pattern that shows up in the footage and degrades image quality noticeably. If your target window has a screen, either remove it or pick a different window.
At $35, the Window Cam is genuinely hard to argue with for anyone starting from scratch. You’re not paying a premium for the purpose-built design — it’s actually one of the more affordable cameras in Wyze’s lineup.
Option 2: Using a Standard Wyze Camera Through Glass
If you already own a Wyze Cam v3, v4, or Cam OG, you don’t need to buy anything new. The manual workaround works well — it just requires a few deliberate settings changes and a little attention to placement. Skip any of these steps and you’ll run into problems. Follow all four and you’ll get solid, reliable footage.
Step 1: Turn Off IR Night Vision (This One Is Non-Negotiable)
This is the single most important thing you can do, and the most common mistake people skip. The IR LEDs on standard Wyze cameras emit infrared light to illuminate the scene at night. When you’re shooting through glass, that IR light bounces straight back off the pane and into the lens, producing a washed-out white glow that completely ruins the footage. It looks like someone pointed a flashlight at the camera.
To turn it off: open the Wyze app, tap into the camera’s live stream, find the moon/night vision icon (usually in the top toolbar), and set Night Vision to Off. Not Auto — Off. The Auto setting will re-enable IR when it gets dark, which defeats the whole purpose.
The good news is that the Wyze Cam v3 and v4 both have color night vision that performs reasonably well using only ambient outdoor light — streetlights, a porch light, security lighting from a neighbor, passing headlights. It won’t be as sharp as a dedicated IR-illuminated image, but it’s genuinely watchable and often more useful because it captures color, which helps with identification.
Step 2: Press the Lens Against the Glass
Don’t just aim the camera at the window from across the room — press it directly against the glass. Eliminating the air gap between the lens and the pane makes a real difference. When there’s space between the camera and the glass, interior reflections have room to develop: the room behind the camera shows up as a ghost image in the frame, the status LED reflects back, and you get light scatter from any indoor sources. Press the lens to the glass and most of that disappears.
For a clean permanent setup, the Wyze Cam Window Mount is an adhesive mount made specifically for this application and it’s compatible with most current Wyze camera models. It holds the camera flush against the glass, keeps it from shifting, and runs about $10. If you’re doing this more than temporarily, it’s worth picking one up.
Step 3: Control Indoor Lighting
Glass is reflective, especially at night when it’s dark outside and lit inside. Any light source behind the camera — overhead lights, lamps, TVs, even the camera’s own status LED — can show up as a reflection in your footage.
The practical fix: turn off lights in the room where the camera is located after dark, or close the blinds behind the camera to block ambient light from the rest of the house. You should also go into the Wyze app settings and disable the camera’s status LED — that little blue or yellow light is small, but pressed against glass at night it creates a distracting dot in the corner of your footage. It takes about ten seconds to disable and makes a noticeable difference.
If you have smart lights in that room, this is a good candidate for a simple automation: lights off in that room after sunset, or at least dimmed significantly.
Step 4: Set Motion Detection Zones
Window placement tends to generate a higher rate of false motion alerts than a standard exterior mount. You’re seeing headlights sweep across the frame, shadows from trees moving in the wind, and changes in ambient light at dawn and dusk — all of which can trigger motion detection.
The fix is a detection zone. In the Wyze app, go to the camera’s settings, find Motion Detection, and draw a zone that covers only the specific outdoor area you want to monitor — the driveway, the front walk, the gate. Exclude the frame edges and sky, which is where most of the false triggers originate. While you’re in there, adjust the motion sensitivity down a notch from the default. It usually takes a day or two of tuning to find the right balance for your specific window and environment.
Which Approach Is Right for You?
Buy the Wyze Window Cam if:
You’re buying a camera specifically for window use and don’t already own a Wyze camera. At $35, the hardware is purpose-built for this from the ground up — the f/1.0 lens, the no-IR design, the glass mount — and you won’t need to dig through settings or troubleshoot glare. It’s a better starting point than buying a standard camera and applying workarounds.
Use a standard Wyze camera if:
You already own a Wyze Cam v3, v4, or OG. Follow the four steps above and the results are genuinely solid — especially with the v4 or OG, both of which have color night vision that handles low-light window use well once IR is disabled. No need to spend $35 on new hardware when what you have will work fine with the right settings.
If you are also weighing whether to pick up the dedicated Wyze Window Cam versus the Wyze Window Mount accessory, that comparison covers the differences between the two products in detail.
Bottom Line
Window-based camera monitoring used to require a fair amount of tinkering to get right. The Wyze Window Cam changes that — it removes the IR problem at the hardware level, includes a purpose-made glass mount, and comes in at $35. If you’re starting from scratch, it’s the straightforward pick. If you already own a Wyze camera, the four-step manual approach still works well and costs you nothing to implement. Either way, getting solid outdoor coverage through a window is very doable with Wyze gear.
Shop Wyze Window Cam on Amazon
This guide is part of our Wyze Security Camera Reviews guide.