
If your Reolink camera keeps buzzing your phone at 2 a.m. over a moth or a gust of wind, the culprit is not a broken camera. It is how the Reolink detection alarm system reads motion. Reolink cameras compare each video frame to the one before it, so any pixel change, whether that is a person walking up your driveway or a beetle drifting past the lens, can register as motion. As a result, bugs, spiderwebs, rain streaks, and swaying branches trigger just as easily as a real visitor. The good news is that a combination of detection alarm settings and a few lighting changes clears up the vast majority of these false alerts, without sacrificing the alerts you want to keep.
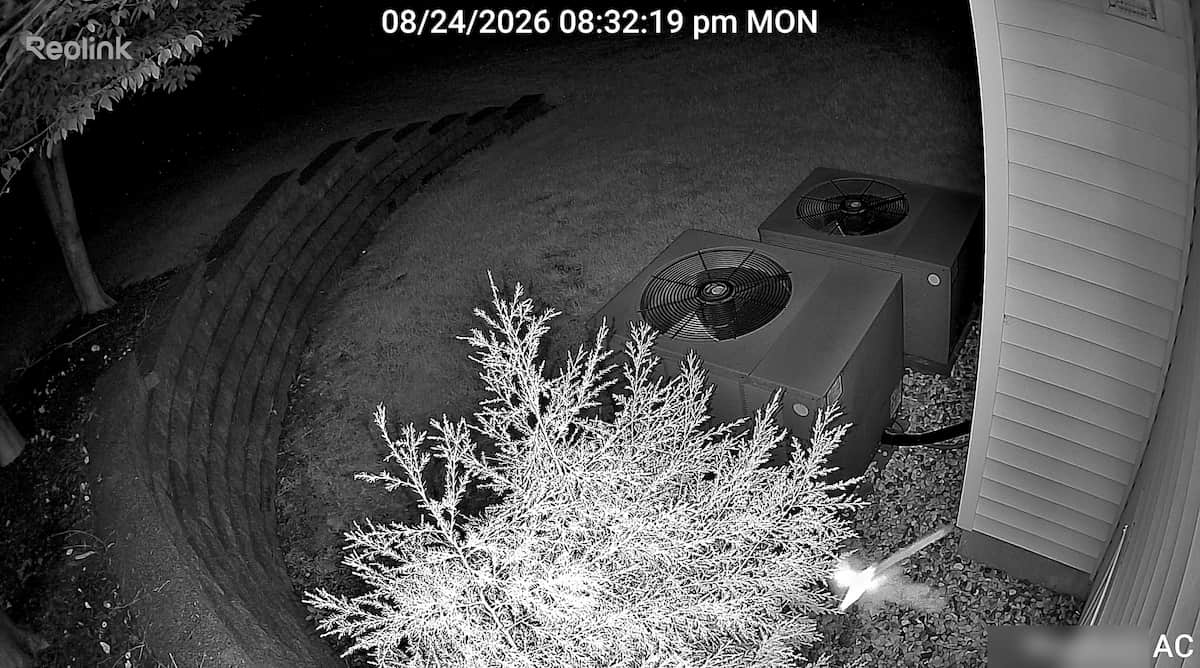
Below is a walkthrough of the settings that make the biggest difference, followed by the lighting and hardware tweaks that address the root cause instead of just filtering around it. I tested the schedule-based sensitivity approach personally on a Reolink TrackMix, and I have included notes on where that differs from the standard Smart Detection controls found in Reolink’s own support documentation.
In this guide:
Why Reolink cameras false alarm on bugs
Detection alarm and software settings
Lighting and hardware adjustments
Quick reference table
FAQ
Why Reolink Cameras False Alarm on Bugs, Rain, and Wind
Every Reolink PoE and WiFi camera relies on frame comparison for standard motion detection. When enough pixels change between two frames, the camera logs it as motion. This works well for large, close movement, but it also means a moth flying six inches from the lens can look identical to significant motion since it fills a large portion of the frame. Additionally, infrared LEDs used for night vision give off a heat signature that draws moths, gnats, and the spiders that hunt them, which is why false alerts spike specifically at night rather than during the day.
Reolink models with Smart Detection add an AI layer on top of this, classifying detected motion as person, vehicle, or animal before sending an alert. However, if “Any Motion” or “Others” remains enabled alongside Smart Detection, the camera still fires on generic pixel change first, which defeats the purpose of the AI filtering. That single setting is usually the largest single source of nuisance alerts.
Reolink Detection Alarm and Software Settings To Reduce False Alerts
Start here before touching any hardware. These settings live in the Reolink app or client under Device Settings, though exact menu paths vary slightly by model and firmware version.
Disable “Any Motion” and “Others”
On AI-enabled Smart Detection models, go to Settings, then Push Notifications, Recording, or Email, then Schedule, and confirm only Person, Vehicle, and Pet or Animal are selected. Uncheck Any Motion or Others. Since generic pixel-change motion treats a moth’s flight path the same as a person’s footsteps, this one change removes the majority of insect-triggered alerts on cameras that support Smart Detection.
Set a Detection Alarm Delay
Under Detection Alarm, look for an Alarm Delay setting and set it to one or two seconds. Bugs fly through the frame in a fraction of a second, so a short delay filters out those quick flashes while still catching a person or vehicle that lingers in view. Reolink’s community forum has repeatedly requested a dedicated “minimum motion length” feature for exactly this reason, and the alarm delay is currently the closest built-in equivalent.
Configure Minimum Object Size
In the Object Size Filter menu, draw a minimum bounding box for Person, Vehicle, and Pet targets. Since insects crawling close to the lens can otherwise appear large enough to register as a valid target, raising the minimum object size keeps small, close-range movement from tripping the AI classifier.
Refine Non-Detection Zones
Mask off the immediate edges and top corners of the frame, since that is typically where spiderwebs form and where porch lights sit. Excluding those regions from detection stops the camera from watching the exact spots most likely to generate false triggers in the first place.
Lighting and Hardware Adjustments
Software settings filter out false alerts after they happen. Addressing the lighting that attracts insects in the first place reduces how often those alerts occur at all.
Turn Off Built-in IR LEDs
Built-in infrared lights emit a heat signature that draws moths, flies, and the spiders that feed on them directly toward the camera housing. Under Display, then Day and Night, disable the automatic infrared lights if your camera’s ambient lighting or a supplemental light source can compensate.
Use External Illumination Instead
Mounting a separate infrared illuminator four to eight feet away from the camera redirects insects toward that remote light source instead of the lens itself. This mirrors a best practice used in commercial intrusion detection systems, where illuminators are deliberately mounted away from the camera body for the same reason. If ambient light is already sufficient, or if you are running a ColorX or other low-light-capable model, an outdoor motion-activated floodlight can let you run Color Night Mode without onboard IR at all, which removes the heat-and-light combination that attracts insects in the first place.
Keep the Housing Clean, Not Treated
It can be tempting to spray a repellent or wipe a scented sheet around the camera mounting bracket to discourage spiders from webbing across the housing. However, Reolink explicitly warns against applying any product near the lens, since residue that reaches the glass can permanently blur your footage. If webs become a recurring problem, a dry brush wipe of the housing every few weeks is a safer habit than any spray or treated wipe, especially given how close most mounting brackets sit to the lens itself.
Matching the Fix to the Pattern You’re Seeing
Not every false alert has the same cause, so it helps to match the fix to the pattern you notice in your clip history rather than changing every setting at once.
If alerts spike specifically after dark: this is almost always the infrared and insect combination described above. Start with the Alarm Delay and Object Size Filter, then move to disabling built-in IR if the problem continues.
If alerts happen during rain or high wind regardless of time of day: the cause is closer to Reolink’s general motion detection mechanism rather than insects specifically, since raindrops and swaying branches produce the same frame-to-frame pixel changes a bug does. Non-Detection Zones around trees, gutters, and drainage paths help here, in addition to the Alarm Delay setting.
If a single corner of the frame keeps triggering: that is a strong sign of a spiderweb rather than active insect traffic, since a web moving slightly in the wind produces a steady, repeating trigger pattern. A Non-Detection Zone over that specific corner, combined with a periodic housing wipe-down, usually resolves it faster than adjusting sensitivity globally.
For PoE cameras recording to an NVR, it is also worth confirming your recording schedule and detection zones are synced between the camera’s local settings and the NVR client, since a mismatch there can cause the NVR to log motion the camera itself was set to ignore.
Quick Reference: Settings That Reduce False Alerts
| Setting | What It Does | Where To Find It |
|---|---|---|
| Any Motion / Others | Disables generic pixel-change alerts in favor of AI classification | Push Notifications / Recording / Email > Schedule |
| Alarm Delay | Ignores motion shorter than the delay window | Detection Alarm |
| Object Size Filter | Sets a minimum size for valid detections | Object Size menu |
| Non-Detection Zones | Masks out high-trigger areas like corners and lights | Detection Settings > Zones |
| Scheduled Sensitivity | Auto-lowers sensitivity during peak insect hours | Detection Settings > Schedule |
FAQ
Why does my Reolink camera only false alarm at night?
Nighttime false alerts are almost always tied to infrared LEDs, since the heat and light draw insects directly toward the lens. Daytime false alerts are more commonly caused by wind-blown branches or shadows instead.
Will disabling Any Motion also block real intrusions?
No. On Smart Detection models, disabling Any Motion simply means the camera relies on its Person, Vehicle, and Pet AI classifiers instead of raw pixel change, so real motion from an actual person or vehicle still triggers an alert.
What is a Reolink PIR sensor and how does it relate to false alerts?
The PIR sensor detects heat-based motion and works alongside the standard camera-based motion detection on many models. Since insects have minimal heat signature compared to a person, cameras that lean more heavily on PIR detection tend to see fewer bug-triggered false alerts than models relying purely on frame comparison.
Do these settings work the same way on battery-powered Reolink cameras?
Battery models generally offer fewer configurable settings than PoE or plug-in WiFi cameras. Alarm Delay and Object Size Filter are available on most Smart Detection battery cameras, but scheduled sensitivity adjustments are more consistently available on PoE and wired WiFi models. If you are setting up a new PoE camera and want scheduled sensitivity from day one, it is worth checking that your NVR or PoE switch supports the same firmware version as the camera, since scheduling features have occasionally lagged behind on older NVR firmware.
For the full individual reviews of the cameras and accessories mentioned here, see the Reolink camera reviews hub. For more configuration walkthroughs like this one, see the security camera how-to guides.