
Blink makes two distinct floodlight camera products with very different mounting requirements — and understanding the difference before you buy is more important than it might seem. The Blink Wired Floodlight Camera is a hardwired unit that replaces an existing outdoor light fixture and mounts to a standard electrical box. The Blink Outdoor 4 Floodlight Camera is a battery-powered wire-free unit that uses a proprietary bracket system. Both share a significant limitation: neither is designed for soffit or ceiling installation out of the box. This guide explains both products, their mounting constraints, and the best options for each.
Blink Floodlight Models: What You’re Working With
| Model | How It Powers | How It Mounts | Soffit/Ceiling Without Adapter |
|---|---|---|---|
| Blink Wired Floodlight | Hardwired to existing wiring | Standard 4″ weatherproof electrical box | No — points straight down |
| Blink Outdoor 4 Floodlight Mount | Camera: 2x AA lithium · Floodlight: 4x D-cell alkaline | Proprietary bracket — wall, gutter, siding | No — points straight down |
| Blink Floodlight Mount (3rd Gen only) | Camera: 2x AA lithium · Floodlight: 4x D-cell alkaline | Proprietary bracket — wall, siding | No — points straight down |
Mounting the Blink Wired Floodlight Camera
The Blink Wired Floodlight Camera replaces an existing outdoor light fixture. The mount point is a standard 4-inch round UL-listed weatherproof electrical box. It is the same junction box used by most hardwired outdoor light fixtures in the US. If your home already has an outdoor flood or security light, there is almost certainly a compatible junction box already in place behind it.
Installation is straightforward: cut power at the breaker, remove the existing fixture, connect the Blink floodlight wires to the existing wiring, and mount the unit to the box. The camera and floodlight assembly points forward and slightly downward from the wall. Because the mount position is determined by where the electrical box is located, the main mounting decision is whether the existing box position gives the camera adequate coverage of your target area.
For most homes the existing outdoor light position works well, typically above a garage door, at a driveway corner, or at an entry point. However, if the existing box position does not suit the camera’s coverage needs, relocating a hardwired electrical box is a job for a licensed electrician. Plan the mounting position carefully before purchase if you do not already have a box in the right location.
Important: The Blink Wired Floodlight Camera must be mounted to a 4-inch round, UL-listed, weatherproof electrical box. A standard indoor electrical box is not sufficient. If the existing box is not weatherproof, replace it before installing the camera.
The Soffit and Ceiling Limitation — What You Need to Know
Neither Blink floodlight model is designed for soffit or ceiling installation out of the box and this is a meaningful limitation that buyers should understand before choosing a mounting location.
For the Blink Wired Floodlight, the soffit problem is a wiring problem. The camera mounts wherever the junction box is. If that box is on a soffit, the camera will point straight down rather than outward at the coverage zone. There is no third-party adapter that cleanly solves this for the wired model — the practical fix is to ensure the junction box is on a vertical wall surface rather than a horizontal soffit before installation.
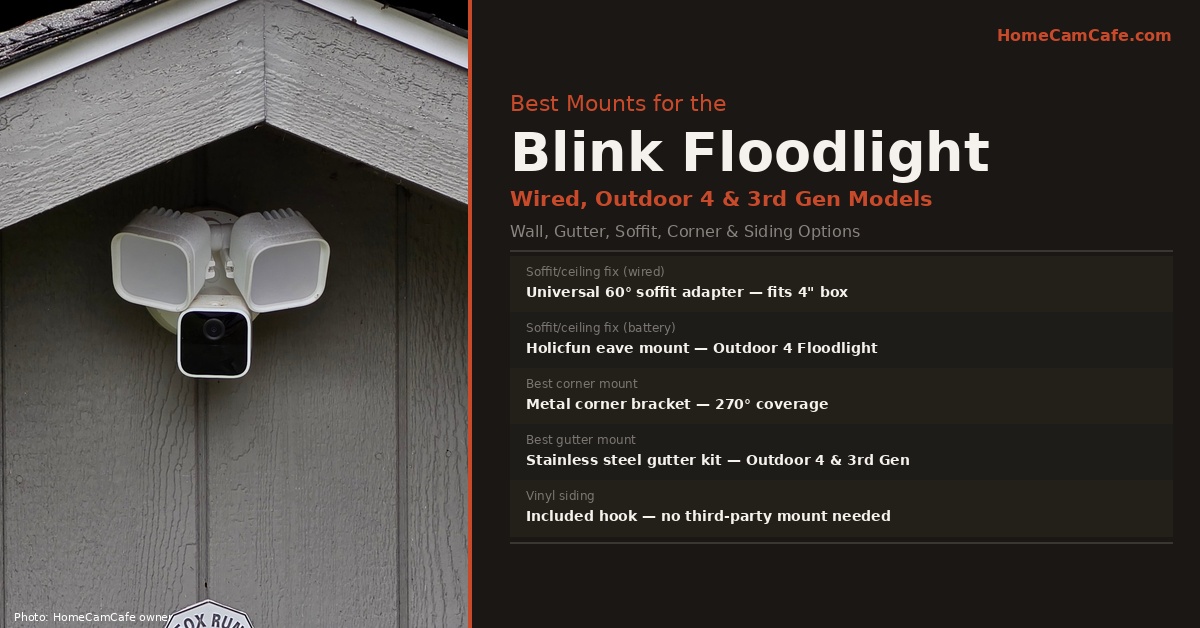
For the Blink Outdoor 4 Floodlight, the Holicfun eave mount for the Blink Outdoor 4 Floodlight & Blink WIred Floodlight Camera is the one legitimate solution. It provides a 90° angle adjustment that enables under-eave installation while keeping the camera right-side up and the floodlight heads aimed outward. It is specifically designed for this camera and is the only verified third-party fix for the soffit limitation on the battery model.
In practice, wall mounting just below the roofline as shown in the photo above is the most practical solution for most homes. At eight to ten feet on a wall the camera has good elevation, the floodlight heads aim outward at the coverage zone, and the soffit problem is avoided entirely.
Best Gutter Mount for the Blink Outdoor 4 Floodlight
For gutter installation without drilling, the gutter mount kit for the Blink Outdoor 4 Floodlight and 3rd Gen Floodlight Camera clips directly to the gutter lip and holds the full floodlight bracket assembly in position. The stainless steel construction resists rust, the adjustable clamp fits K-style and standard gutter profiles, and the no-drill design means the assembly can be repositioned if coverage needs change.
Gutter mounting is a strong choice for the battery floodlight as it provides elevation, a natural outward-and-downward angle, and keeps the unit above easy reach. Additionally, the gutter position avoids the soffit angle problem entirely since the camera hangs from the gutter face pointing outward rather than being mounted overhead.
Best Corner Mount for the Blink Floodlight
Corner mounting is one of the most effective placement strategies for a floodlight camera. A camera at a building corner covers two full sides of the property simultaneously, and the floodlight heads illuminate both approach angles. The metal corner mount for the Blink Outdoor 4 Floodlight and 3rd Gen Floodlight Camera is a purpose-built stainless steel bracket that replaces the standard wall plate and positions the camera at a building corner for 270° coverage. It installs with screws into the corner surface and includes all necessary hardware.
Vinyl Siding Installation
Both the Blink Outdoor 4 Floodlight Mount and the 3rd Gen Floodlight Mount include a vinyl siding hook in the box therefore no third-party mount needed. The hook rolls into the seam between siding panels without drilling and holds the full floodlight assembly in position. This is the cleanest no-drill siding option and is completely reversible. No separate purchase required.
Battery Life Considerations for High Mounts
The Blink Outdoor 4 Floodlight Camera runs on AA lithium batteries for the camera and D-cell alkaline batteries for the floodlight heads — two separate battery systems. The floodlight adds power draw beyond the camera alone, which means battery changes will be more frequent than with the standard Outdoor 4. Plan accordingly before committing to a high-elevation install.
Blink recommends installing the floodlight at least 12 feet off the ground for optimal motion detection coverage. At 12 feet battery access is still manageable with a standard ladder. Above 14 feet it compounds significantly so be sure to factor that into your location decision before drilling.
For the wired model, battery changes are not a factor as the hardwired connection handles power continuously, which is a meaningful practical advantage for high-elevation permanent installations.
One additional compatibility note: the Blink Outdoor Floodlight Mount works with both the Outdoor 4 and the Outdoor 2K+ camera. If you own or plan to upgrade to the Outdoor 2K+, the same floodlight mount and all the third-party mounts covered in this guide remain compatible.
Bottom Line
The Blink Wired Floodlight mounts to a standard 4-inch weatherproof electrical box — position is determined by where your existing wiring is. The Blink Outdoor 4 Floodlight uses a proprietary bracket with a soffit/ceiling limitation — the standard mount points straight out from the wall and cannot angle downward for overhead installs. For the battery model, the Holicfun eave mount is the only verified fix for under-eave installation. For most installations, wall mounting just below the roofline at eight to ten feet avoids the soffit problem entirely and provides good coverage elevation. The gutter mount kit handles no-drill elevated installs for the battery model, and vinyl siding hook comes included in the box — no separate purchase needed. Factor the dual battery system into your maintenance planning for any high-elevation installation.
See also: Blink Camera Reviews · Blink Wired Floodlight Camera Review · Best Mounts for Blink Cameras · Blink Subscription Plans Explained · Best Batteries for Blink Cameras