
The Reolink Duo 3 PoE is our first Power over Ethernet camera on the site, and we paired it with a Ubiquiti UACC-PoE+-2.5G injector for the install. After running it side by side with our Tapo C675D for several days, this dual-lens bullet camera earned a strong hands-on rating. However, it is not a camera for someone who has never touched a PoE setup before, and a few rough edges keep it from a perfect score.
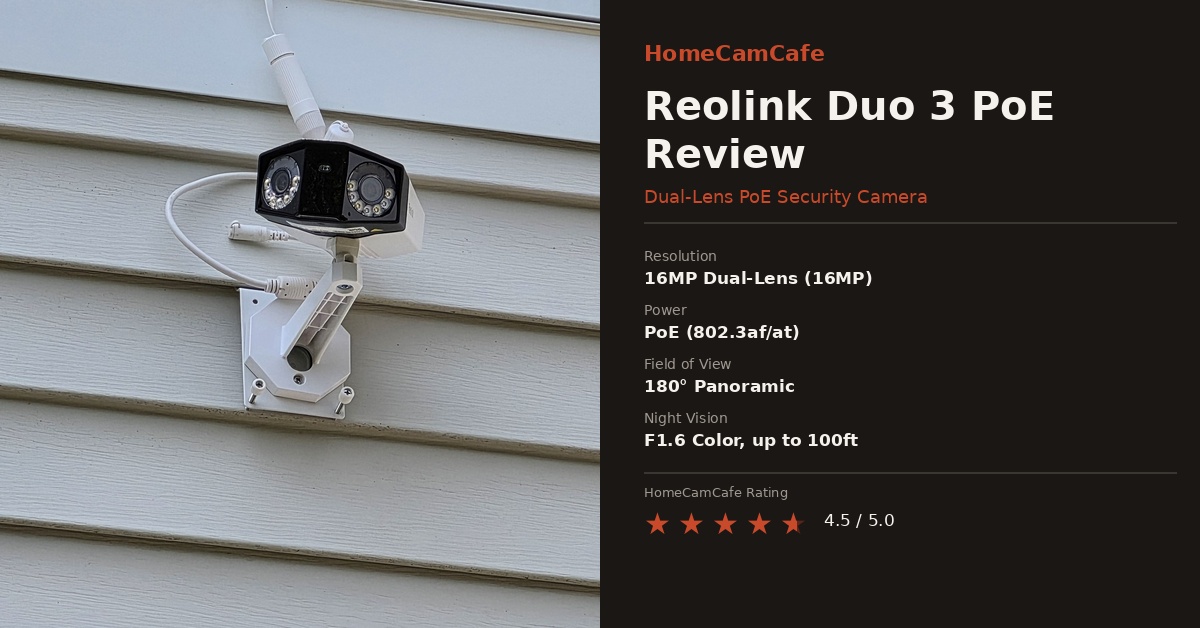
What Is the Reolink Duo 3 PoE?
The Duo 3 PoE combines two 4K image sensors into a single housing to produce a stitched panoramic image with an effective 180° field of view. According to Reolink’s own spec sheet, the camera captures footage at a maximum resolution of 7680 x 2160 (16MP Ultra HD) at up to 20 frames per second.
The Duo 3 PoE uses two matching lenses mounted side by side, each covering roughly half of the scene, and Reolink’s dual-image stitching algorithm blends the two feeds together in real time into one seamless 180° panorama. This is a different approach from a wide-angle-plus-zoom pairing; both lenses on the Duo 3 PoE capture the same type of footage, just from slightly different angles, so the stitched result reads as one continuous wide image rather than a wide shot with a zoomed inset.
As a result, you get considerably more usable coverage from one mounting point than a typical single-lens bullet camera provides, which is a big part of the appeal for anyone trying to cover a wide driveway or backyard without running two separate cables.
Because this is the PoE variant, the camera has no built-in battery and no Wi-Fi radio to fall back on. Power and data both travel over a single Ethernet cable, so you will need a PoE-capable NVR, switch, or injector to run it. That is a meaningful difference from Reolink’s WiFi-branded Duo 3, and it is worth confirming you are buying the right SKU before you order, since the two look nearly identical in photos.
The appeal of going wired instead of wireless is straightforward: a PoE camera does not depend on Wi-Fi signal strength reaching the mounting location, so it holds up better at the far end of a property or anywhere a router’s range starts to get shaky.
Model naming can get confusing: Reolink sells several cameras under the Duo name, and the naming is not always intuitive at a glance. The lineup includes the older Duo 2 PoE, the WiFi-only Duo 3, this wired Duo 3 PoE, and the vandal-resistant Duo 3V PoE, each with different power requirements and, in the Duo 2’s case, a lower resolution sensor pair. Double-check the exact model number on the listing before you buy, since photos across these variants look very similar.
Check the current price on Amazon
Setup and PoE Installation
This was our first PoE camera on the site, and we ran it through a Ubiquiti UACC-PoE+-2.5G injector rather than a switch or NVR. The pairing worked amazingly well once everything was connected, with a stable link and no dropouts during testing. That said, getting to that point took more patience than we expected. Reolink’s included documentation is thin, and it assumes a level of networking familiarity that a first-time PoE buyer is unlikely to have. If you already understand how PoE injectors, power budgets, and cable runs work, the setup itself is straightforward. If you do not, budget extra time for trial and error or keep the injector’s own manual handy for reference.
We used the Ubiquiti injector specifically because it is one of the two PoE injectors we have tested extensively for this site, and it delivered clean, consistent power to the camera with no flickering or reboot loops. The connection path itself is simple once you see it laid out, even if the box does not spell it out clearly:
CONNECTION PATH
Router or network switch → PoE injector → Ethernet cable → Reolink Duo 3 PoE
For readers building a PoE setup from scratch, our PoE injector buying guide covers both the Ubiquiti and TP-Link injectors we have used, in case you need a specific recommendation before you order the camera.
See the Ubiquiti PoE+ injector on Amazon
Setup tip: Connect and power on the camera indoors before you mount it. Confirm the injector powers it, the app finds it, live view works, and recording is configured, all on a table rather than on a ladder. Do not assume the PoE port will negotiate correctly on the first try either. If the camera does not power on immediately, disconnect and reseat the Ethernet cable at both ends before troubleshooting further. In addition, if you are running a longer cable length, a dedicated injector like the Ubiquiti or the TP-Link TL-PoE160S delivers more consistent power than a budget unmanaged PoE switch.
For a permanent outdoor installation, do not leave the Ethernet connector exposed to the weather once everything is tested and working. A weather-resistant junction box at the cable entry point, or simply running the cable through a wall opening rather than along the exterior, keeps water out of the connector over the long run. If you are running cable along an exterior wall instead, form a drip loop below the connection point so water travels away from the plug rather than into it. It is a small detail, but it is the difference between a connection that lasts for years and one that starts corroding after the first real storm.
App Experience and the Unified Dual-Lens View
The most interesting part of owning this camera day to day is how the Reolink app handles the two lenses. Rather than showing you two separate video feeds, it combines them into a single, unified panoramic image by default. From there, you can tap the left or right half of that image to jump into a more detailed, zoomed view from whichever lens covers that area. In practice, this works better than it sounds. Consequently, you get the wide situational awareness of a panoramic camera along with the option to drill into specific detail without switching apps or cameras.
Digital zoom on the detailed view is excellent, noticeably better than we expected going in. Faces that would be an unusable blur on a lot of single-lens cameras at the same distance stayed legible after zooming in, particularly in daylight, and cars driving by are clearly visible even at distance. License plates are a tougher ask. We were not able to read plates reliably at zoom, so if plate capture is your priority, do not count on this camera for it. Furthermore, the Motion Track feature, which condenses a motion event into a single summary image, is a useful addition for quickly scanning notifications without opening full video clips every time.
Why does the live view look different on two phones?
If you share Reolink login access with a family member, you may notice the live view for the Duo 3 PoE looks completely different from one phone to the next. On one device the stitched panorama fills the screen with a small navigator strip underneath. On another, it shows only the flat stitched image with nothing else. This is not a bug, and it has nothing to do with the account or app version. Instead, it comes down to a local player setting called Default Player, found under App Settings in the Reolink app. Classic Mode displays a standard 1:1 stitched view, while Fullscreen Mode gives an adjustable, pannable view of the full 180 degree image. Because this setting lives on each individual phone rather than syncing through the account, two devices logged into the same camera can display the feed in noticeably different ways. If your live view looks cramped or hard to see, switching to Fullscreen Mode under App Settings usually solves it.
Night Vision and Image Quality
Both lenses use an F1.6 aperture, which is a meaningfully wide opening for a security camera and translates into better light gathering once the sun goes down. As a result, low-light footage held onto more usable detail than we expected before full darkness set in. Once it is fully dark, the built-in infrared LEDs take over and illuminate out to roughly 100 feet, which is plenty for a typical yard, driveway, or side entrance. In addition, daytime footage across the stitched panorama is sharp from edge to edge, since both lenses are matched sensors rather than one wide unit paired with a lower-detail secondary lens.
Where the camera does not try to compete is with the spotlight-driven full-color night vision found on some competing cameras. Instead, the Duo 3 PoE leans on infrared illumination after dark, which produces black-and-white night footage rather than color. That is a reasonable tradeoff for a wired PoE camera at this position in Reolink’s lineup, however it is worth knowing going in if full-color night footage is a priority for you. Reolink’s spec sheet also lists a substream option running 4 to 20 frames per second alongside the main stream, which is worth enabling if you are recording to a bandwidth-limited NVR or a slower internet connection for remote viewing.
Storage Options
The Duo 3 PoE supports a microSD card up to 512GB for local storage, so continuous or motion-triggered recording is possible without a subscription. Our setup runs a 128GB Silicon Power microSD card, and video retrieval from it has been fast, almost as quick as pulling a clip from cloud storage. Alternatively, the camera can record to a Reolink NVR or an FTP server, which is the more common setup for buyers who are already running a PoE camera system rather than a single standalone unit.
Video is encoded in H.265, which keeps file sizes down considerably compared to older H.264 cameras, meaning a given microSD card or NVR drive stretches noticeably further before you need to worry about storage running out. No subscription is required for any of these storage paths, which fits the no-monthly-fee approach we generally prefer to recommend on this site.
Reolink Duo 3 PoE vs. Duo 2 PoE
A lot of shoppers researching this camera are also comparing it against the older Duo 2 PoE, and it is a reasonable question to ask before spending more on the newer model. The main difference is resolution. The Duo 2 PoE is an 8MP dual-lens camera, while the Duo 3 PoE steps up to the 16MP sensor pair covered above. That extra resolution matters more than it might on a conventional single-lens camera, because the Duo 3’s pixels are spread across a full 180° panorama rather than a narrower frame, so the higher megapixel count translates directly into more usable digital zoom detail.
We would not tell someone to replace a properly positioned Duo 2 PoE just because a newer model exists. However, for a new installation where fine detail and digital zoom matter, such as identifying a face across a wide driveway, the Duo 3 is the model we would recommend.
Who Should Buy This Camera
The Reolink Duo 3 PoE is a strong fit if you already have, or are willing to set up, a PoE injector, switch, or NVR, and you want one camera to cover a wide area with strong motion detection and solid zoom detail. It is a poor fit if you have never worked with PoE before and want something you can mount and forget in ten minutes, since the thin instructions and fiddly mounting bracket will add friction to that experience.
Given how well it performed once it was actually running, we think the setup friction is worth pushing through for most buyers, but it is fair to go in with accurate expectations rather than assuming this will be as simple as a plug-in WiFi camera.
A strong fit if you:
- Need to cover a wide driveway, yard, or property line
- Want a wired connection instead of relying on WiFi
- Are comfortable with basic networking, or willing to learn
- Care about zoomable detail across a broad scene
- Want flexible local recording without a subscription
Consider another camera if you:
- Want a fully guided, plug-in WiFi setup
- Cannot run Ethernet to the mounting location
- Need pan and tilt rather than a fixed 180° view
- Expect detailed instructions for every networking step
- Only need to monitor a narrow doorway or small room
If pan and tilt coverage matters more than a wide-angle panorama, and the space you’re covering is indoor rather than outdoor, our Reolink E1 Pro review covers a wired-or-wireless pan-tilt option instead.
Motion Detection Performance
We benchmarked motion detection against the Tapo C675D, a camera we already rate highly on this site. Motion detection on the Duo 3 PoE was as good as the C675D, and in our testing it edged ahead slightly, triggering a bit more consistently on movement at the edges of the frame. Both cameras use AI-based person, vehicle, and animal detection to cut down on false alarms, and both performed well in that regard during our test window.
Detection range in particular stood out during testing. The camera reliably picks up approaching vehicles well over 100 feet out, and it has caught a neighbor pulling out of their own driveway from a similar distance across the street. That is a longer effective detection range than we expected from a fixed dual-lens camera, and it is a meaningful advantage if you are trying to cover a long driveway or a wide stretch of street rather than just the area immediately in front of the lens.
Mounting: The One Real Weak Point
Our biggest complaint with the Duo 3 PoE is the mounting hardware. Attaching the camera housing to its included bracket is more fiddly than it should be, and it took noticeably more effort than mounting our other tested cameras. Once it is on the wall and aimed correctly it stays put, so this is a one-time installation annoyance rather than an ongoing reliability issue. Still, it is worth knowing about before you climb a ladder to install it, since you may want a second set of hands or a bit more patience than usual for this step.
The Verdict
Reolink Duo 3 PoE: 4.5 / 5
The Reolink Duo 3 PoE delivers excellent, best-in-class motion detection, a clever unified dual-lens app experience, and sharp digital zoom, all through a single reliable Ethernet cable. As a result, it is one of the strongest PoE cameras we have tested on this site so far. The documentation is thin and the mounting bracket is more difficult to attach than it should be, so this is a better fit for buyers who already have some PoE or networking experience than for a complete beginner’s first camera.
If you already have a PoE injector or NVR in place, or you are comfortable setting one up, the Duo 3 PoE is easy to recommend.
What We Wish Reolink Explained Better
None of the following is difficult once you know it, but the included documentation does not walk a first-time buyer through any of it clearly:
- A PoE power source is required. The camera does not become a PoE camera just because it is plugged into any Ethernet port. The switch, NVR port, or injector on the other end has to actually supply PoE power.
- One injector is enough for a single camera. You do not need to buy a full PoE switch or NVR just to run one Duo 3 PoE. A single injector, like the ones covered above, does the job.
- Test before you mount. As covered above, get everything running on a table first, since troubleshooting a connection while standing on a ladder is far more frustrating.
- Mount placement affects the whole 180° frame. Because this camera covers such a wide angle, a slightly wrong angle can pull in a neighbor’s yard, a street, or a bright light source you would rather exclude from recordings.
- Model names look similar. Duo 2, Duo 3, Duo 3 WiFi, Duo 3 PoE, and Duo 3V PoE all sell alongside each other, so confirm the exact listing before you buy.
Frequently Asked Questions
Does the Reolink Duo 3 PoE include a PoE injector or NVR?
No. The standalone camera does not include a PoE injector, switch, or NVR. Reolink also sells NVR bundles if you would rather buy the camera and recorder together, but if you order the camera alone, you will need your own PoE source, such as the TP-Link TL-PoE160S injector or the Ubiquiti unit we used for this review.
Can the Reolink Duo 3 PoE run over WiFi instead?
Not this specific model. Reolink also sells a separate Duo 3 WiFi version for buyers who want a wireless install instead of running Ethernet, however that is a different SKU with different specifications, not an alternate mode on this camera.
How do you update the firmware on the Reolink Duo 3 PoE?
Firmware updates are pushed through the Reolink app or the Reolink Client desktop software. Given how sparse the included instructions are for setup in general, we would recommend checking Reolink’s official support site directly if you run into anything the app does not walk you through clearly.
For the full individual reviews see the Tapo C675D review and the PoE injector buying guide. For brand-specific guides see the Reolink camera hub. For the full PoE cluster see the PoE security cameras hub.