
You just bought a new security camera, fired up the app, and hit a wall: the camera refuses to connect because your phone is on the 5 GHz band and the camera insists on 2.4 GHz. This is one of the most common setup headaches in smart home tech, and it trips up experienced users just as often as first timers. As a result, it is worth understanding exactly why it happens before jumping into fixes, because the right fix often depends on what kind of router or mesh system you have.
📡 Why does this happen?
Modern mesh networks and many routers combine the 2.4 GHz and 5 GHz bands under one network name (SSID), a setup called band steering. Your phone naturally connects to the faster 5 GHz band whenever it can, since that is what band steering is designed to do. However, most home security cameras only support 2.4 GHz. I have personally tested cameras from Wyze, Blink, Ring, Tapo, and eufy, and every one of them ships as 2.4 GHz only out of the box. During setup, the camera’s app needs your phone on that same band as the camera, and that is exactly where the conflict happens. In addition, this is not a defect in your router or your camera. It is simply two pieces of technology that were not designed with each other in mind.
4 Ways to Fix It, Easiest to Most Complex
Steps for Specific Routers and Mesh Systems
The four methods above work on virtually any setup. That said, if you know exactly what router or mesh system you have, one of these targeted approaches may save you a step.
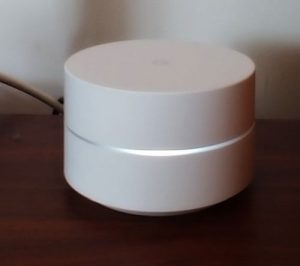
Google’s mesh systems do not allow band separation at all, so Method 2 is off the table here. Instead, go straight to Method 3 (get far from the router) or Method 4 (phone hotspot). Method 4 tends to be the more reliable of the two, particularly in larger homes.
Eero combines bands under one SSID by default and does not expose separate band names in the consumer app. Owners with an Eero subscription can sometimes find a band-steering toggle under advanced settings, but this varies by firmware version. If you do not see that option, Method 3 or Method 4 will get you connected without digging through settings.
Unlike Google WiFi and Eero, Orbi lets you view and rename the 2.4 GHz and 5 GHz bands separately right in the app. This makes Method 2 the fastest option. Log into the Orbi app, go to network settings, and you will see each band listed with its own name field.
ISP-provided gateways usually allow band separation, but the setting is often buried. Log into the gateway’s admin panel (typically 10.0.0.1 for Xfinity, or check the label on the device itself), look for a Wireless or Gateway settings tab, and find the option to set a unique network name for each band. If you cannot locate it, Method 1 or Method 4 will work regardless of gateway brand.
Still Stuck? Troubleshooting the Common Snags
Double check that your phone actually switched to the renamed 2.4 GHz network and not a cached version of the old combined SSID. Forget the network on your phone, then reconnect manually. In addition, some routers take a minute or two to apply the change, so give it a moment before retrying.
Not every phone exposes this setting. On iPhone, this is generally available without extra steps. On Android, the option is sometimes labeled “AP Band” or hidden under hotspot advanced settings, and a handful of carrier-locked phones omit it entirely. If your phone does not offer the choice, fall back to Method 1 or Method 3.
This is usually a separate issue from band steering. It often points to a weak 2.4 GHz signal at the camera’s mounted location, interference from other devices like microwaves and cordless phones, or a router that is overloaded with too many connected devices. A dedicated 2.4 GHz access point near the camera, covered below, is the most reliable fix for this particular problem.
Still Having Trouble? It Might Be Your Router
If you are fighting this problem regularly with multiple devices, it may be a sign that your router’s band management is not flexible enough. Routers that give you control over your 2.4 GHz and 5 GHz settings separately make life considerably easier when adding smart home devices. Another option worth considering is a dedicated 2.4 GHz access point. Placed between your router and camera, it creates a connection point your camera can reliably reach without competing with your phone for the same band.
For a single problem camera or a small dead zone, the TP-Link RE105 is worth a look. It is a single-band, 2.4 GHz-only extender, which actually works in its favor here since there is no 5 GHz radio for your phone to default to during setup.
For larger homes or multiple cameras, I would point you toward two routers I have had good experience with for smart home setups. The Netgear Orbi RBK752 mesh system is my top pick for larger homes. Unlike Google WiFi, it lets you view and adjust band settings separately, which makes adding 2.4 GHz-only cameras much less painful. It covers up to 5,000 square feet and handles a large number of connected devices without issue.
For smaller homes where a single router is enough, the Netgear Nighthawk AC1900 gives you full control over both bands and has been rock solid in my experience with 10 or more devices connected simultaneously.
Quick Reference: Which Method Should I Try?
Good news for future purchases: a small but growing number of newer cameras now include dual-band support, which eliminates this problem entirely. When shopping for your next camera, check the specs for dual-band WiFi before you buy.
Frequently Asked Questions
2.4 GHz radios are cheaper to manufacture and reach farther through walls than 5 GHz, which matters more for a battery-powered outdoor camera than raw speed does. As a result, most manufacturers stick with 2.4 GHz only, even on newer models.
No. Band matching is only required during initial setup, when the camera’s app needs to talk directly to the camera over WiFi. Once the camera is connected and configured, it communicates with the cloud independently, and your phone’s band has no effect on it.
If you frequently add new 2.4 GHz-only devices, a router or mesh system that lets you separate the bands, such as Orbi, removes the headache permanently. Otherwise, the four methods above only need to be used once per device, at setup.
Start Simple, Work Your Way Up
Try Method 1 first, since it takes two minutes. If you are on a mesh network that will not let you separate bands, skip straight to Method 4. The phone hotspot trick works on virtually every camera and every network setup, it just takes a few extra steps. Once your camera is connected, you will never have to do it again, at least not for that device.
For brand-specific setup help, see the full guides for Wyze, Blink, and Ring cameras. For more on choosing a router or mesh system built for a multi-camera home, see the how-to guides hub.