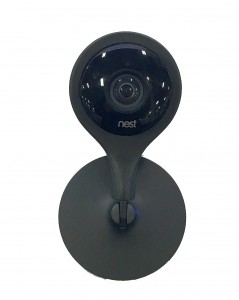
 In addition to all the hardware improvements that came with the Nest Cam, a new mount was introduced. Proper use of the mount and positioning of the Nest Cam will make a significant difference in video quality and usefulness of the camera. This article will show you how to select the best place to put a Nest Cam and how to put it there. Although this article is written with Nest Cam in mind, the concepts presented can apply to many other cameras, especially the predecessor of Nest Cam which is called the DropCam Pro.
Your Nest Cam came with a protective clear lens cover that peels off so be sure to remove that before using the camera. The Nest Cam is already attached to the stand when you remove it from the box so there’s no additional assembly that’s required. The included stand is a weighted mount that has a magnet in the bottom. We’ll talk more about the magnet later. The Nest Cam can pivot back and forth as well as rotate completely. These are important adjustment features because if mounting it permanently, you may want to do some fine tuning of the positioning of the camera.
The other thing to keep in mind when selecting the best place to put a Nest Cam is the availability of power. Unlike a completely wireless camera such as an Arlo Smart Home Security Camera, the Nest Cam needs an A/C outlet located within ten feet as that’s how long the cable is that comes with the camera. Of course, you can replace the 10 footer with the 20 Foot USB Cable for Nest Cam which would double the length.
The first thing to do is decide what you want to monitor. Keeping in mind the Nest Cam has a 130 degree wide angle lens, the final position for the camera should account for the very large span of site. To put it into perspective, to keep watch over an entire room, you can place the nest Cam in a corner and it will provide a wall to wall view. You will be able to see an entire room. Generally speaking, the best place to put a Nest Cam is the corner of a room.
Hopefully you have a corner shelf available where the Nest Cam can be placed. I suggest the location be at least 4-6 feet high. The bottom of the stand that comes with the Nest Cam has rubber feet and the device is quite steady when placed upright. If there isn’t a corner shelf, the Nest Cam can be mounted on a ceiling or a wall. If mounting on a wall or ceiling, Nest provides a mounting plate with self drilling screws. Attach the metal mounting plate to the ceiling or wall. The bottom of the Nest Cam has a magnet that can be fully exposed by removing the protective pad. It’s important the protective pad be removed because that magnet (which is very strong) is what’s going to keep the Nest Cam in place.
If the nest Cam is attached to a ceiling, you will find the image to be upside down. No worries, the image can be rotated using the camera settings.
Can’t find a corner to put your Nest Cam? Don’t want to drill holes in the ceiling or wall? Consider the ElHook Stick-On Nest Cam Security Video Wall Mount. It’s a handy way to perch a Nest Cam onto a window or wall. This is a clever mount that uses temporary adhesive strips to attach a shelf against the window or wall. Your Nest Cam sits atop the shelf just like it would on your shelf or counter. Nice mount. Not sure why Nest didn’t think of this one.
Moving the Nest Cam to another room is an easy task assuming it’s still on the same wireless network. It’s just a matter of unplugging the camera, moving it to the new location and plugging it back in. The Nest Cam will automatically join the new network within a few minutes.
So far we covered the best place to put a Nest Cam if monitoring the action indoors. Monitoring outdoor activities can also be accomplished by pointing the Nest Cam through a window. That’s not as easy as it sounds and we have a detailed article on Using a Nest Cam Through a Window which covers that topic in greater detail.
The versatility of the Nest Cam makes selecting the best place to put a Nest Cam fairly simple. Using the advice contained in this article should provide everything needed to place your Nest Cam in the most optimal location.
