
The Reolink TrackMix is one of the more capable pan-tilt-zoom cameras we have discussed on this site, and after a few weeks of watching it track people, cars, and wildlife across a large front yard, it has earned a place among our favorite auto-tracking cameras. It comes in both WiFi and PoE versions, and since the dual-lens hardware and tracking features are identical between them, this review covers both rather than isolating to one connection type. Our test unit is the PoE version, paired with the Reolink RLN8-410 NVR we already had running on this site.
Check the current price on Amazon
Table of Contents
What Is the Reolink TrackMix?
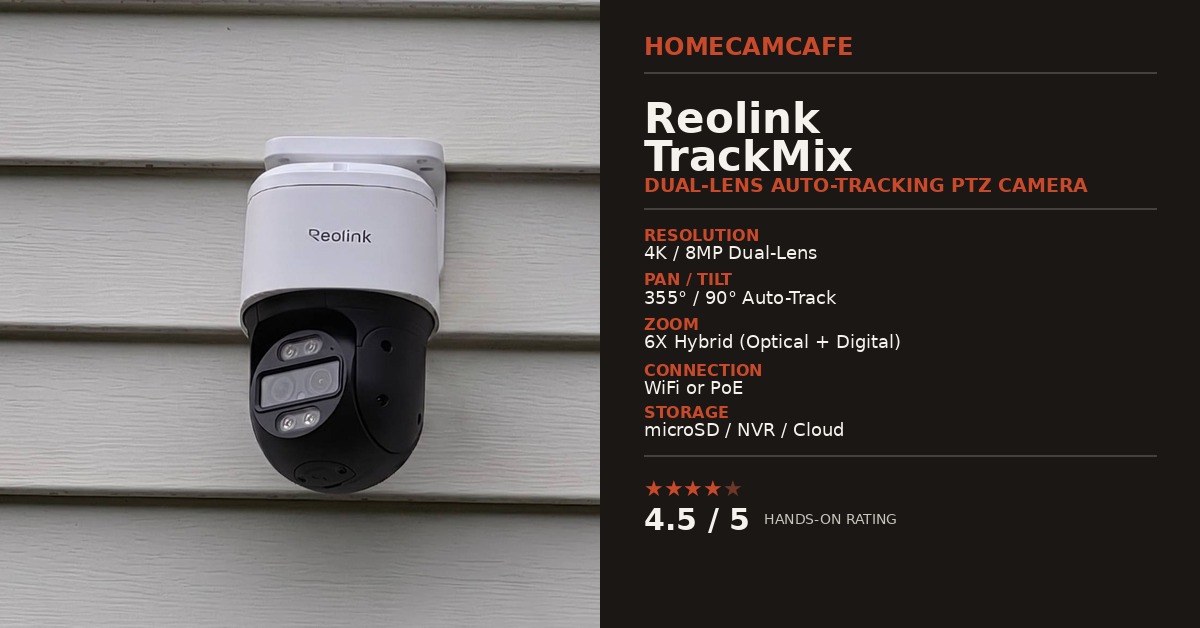
The TrackMix pairs a wide-angle lens with a telephoto lens in a single housing, combining a 4K, 8MP sensor pair to deliver a full-scene view alongside a 6X hybrid zoom close-up of whatever it is tracking. The pan-tilt motor sweeps 355° horizontally and 90° vertically, which in practice means the camera can cover nearly an entire yard from one mounting point instead of leaving blind spots at the edges of a fixed frame.
This is not a small camera. It is definitely one of the heavier units we have owned, noticeably more substantial in the hand than a typical bullet or dome camera, and that extra weight is worth keeping in mind when you pick a mounting surface and bracket.
Person, vehicle, and pet detection all run for free through Reolink’s on-device AI, with no subscription required to use any of it. In our testing, the free AI has been fairly accurate. It reliably detects cars, but it has occasionally classified a person as an animal when the subject was farther away or partially obscured.
On the rare occasion a false alert does slip through, it is almost always a flying insect at night rather than a real subject. Our Reolink detection alarm settings guide covers the exact Alarm Delay and Object Size settings we used to cut those down further.
WiFi or PoE: Which Version Fits Your Setup?
Reolink sells the TrackMix in several connectivity flavors, but the two most relevant for a typical home installation are WiFi and PoE. The WiFi version still needs a wired DC power connection, so it is not fully cordless, but it skips the Ethernet run entirely and connects over Wi-Fi 6. The PoE version instead pulls both power and data over a single Ethernet cable, which means no separate power adapter and a more stable connection at range, provided you already have a PoE injector, switch, or NVR port available.
We chose PoE for our install specifically because we already run the RLN8-410 NVR on this site, and adding the TrackMix to that system meant one more Ethernet run rather than a new power adapter to plan for. If you do not already have PoE infrastructure in place, our PoE security cameras hub covers the injectors, switches, and other PoE cameras we have tested.
The WiFi version delivers essentially the same tracking, zoom, and detection performance covered throughout this review, just over a wireless connection instead of a cable.
See the Reolink TrackMix WiFi on Amazon
Reolink also sells Battery and LTE versions of the TrackMix for locations with no power or network access at all. We have not tested those variants, so we cannot speak to their tracking or battery performance directly.
Auto-Tracking: Three Modes, and Why It Matters
The tracking feature is the reason to buy this camera over a simpler pan-tilt model, and Reolink gives you three ways to run it. Understanding the difference between them made a bigger impact on how well the camera performed for us than almost any other setting.
- Digital Tracking Only. The camera stays completely stationary and tracks a moving subject by digitally zooming in within the wide-angle lens’s fixed frame. If the subject leaves that frame, the camera does not physically move to follow it.
- Digital Tracking First. The camera starts with a digital zoom on the subject, then only activates the pan-tilt motor if the subject is about to leave the wide-angle frame entirely.
- Pan/Tilt Tracking First. The motor engages immediately and continuously repositions the camera to keep the subject centered, prioritizing physical movement over digital zoom.
For a large, mixed-traffic front yard covering people, vehicles, and animals, we settled on Digital Tracking First as the best overall setting, and it is the mode we would recommend to most readers starting out. Pan/Tilt Tracking First sounds appealing in theory because it keeps a single subject centered, but cars move much faster than people or pets. With the motor set to chase every passing vehicle, the camera can whip back and forth aggressively enough to occasionally lose track of a person walking the sidewalk at the same time.
Digital Tracking First instead lets the wide-angle lens do the bulk of the work, watching the whole scene and only engaging the motor when something is actually about to leave the frame. As a result, footage stays smoother, the physical motor sees less wear over time, and the camera still catches a slower-moving subject without over-committing to whichever target moved first.
Which tracking mode fits your yard?
If you are covering a small, enclosed space under roughly 100° of view, Digital Tracking Only keeps things simple and avoids unnecessary motor movement. For a wide property with mixed traffic like ours, Digital Tracking First is the practical middle ground. Pan/Tilt Tracking First is best reserved for a single, predictable subject area, such as a narrow side yard or a wildlife feeder, where you want the telephoto lens locked onto one thing at a time rather than juggling several.
Setting a Monitor Point
Once the camera finishes tracking a subject, it needs somewhere to return to, and that default resting position is called the Monitor Point. Setting one is straightforward through the Reolink app, an NVR, or the desktop client. Open the live view, use the PTZ directional controls to frame the angle you want as your default, then open the Monitor Point menu and select Reset Monitor Point to lock in that position.
From there, enable Auto Return to Monitor Point and set an interval, adjustable between 10 and 300 seconds, that controls how long the camera waits after tracking ends before it snaps back.
We would treat this as a required setup step rather than an optional one. Without a configured monitor point, the camera can drift toward whatever angle it last tracked to and stay there, which defeats the purpose of a wide-coverage PTZ camera in the first place.
Fine-Tuning the Auto-Return Timers
Two additional timers, found under Time to Stop Tracking, control how quickly the camera gives up on a subject and resets. Object Stops governs how long the camera keeps focusing on a subject after it stops moving, with a 20 second default. Object Disappears governs how long the camera lingers on the spot where a subject left the frame before resetting, with a 10 second default.
For a yard with regular vehicle traffic, we found the default 10 second Object Disappears window too long. A car passes and vanishes from frame in a couple of seconds, yet the camera continues staring at the edge of the property for the remaining time, which can mean missing a person entering from the opposite direction.
Dropping that timer to 3 to 5 seconds gets the camera back to its monitor point, and back to watching the full yard, noticeably faster after a vehicle passes. The Object Stops timer, on the other hand, is reasonable left closer to default. Animals in particular tend to pause and sniff around before moving again, so a shorter timer there risks the camera snapping away right before the next bit of motion.
Storage Options: microSD and NVR
The TrackMix records to a microSD card up to 512GB or a Reolink NVR, and you are not locked into just one. Unlike the battery-powered TrackMix, the PoE and WiFi versions covered in this review do not currently support Reolink Cloud, so microSD and NVR are the only storage paths available on this hardware.
The microSD slot sits underneath the camera head, protected by a small weatherproof cover secured with two Phillips screws. Removing the cover exposes the card slot and the reset button, and once the card clicks into place, the cover needs to go back on tightly to preserve the camera’s weatherproof rating outdoors.
Because our TrackMix runs into an NVR, we did not strictly need a microSD card as well, but we added one anyway, and it turned out to be a worthwhile decision rather than a redundant one. A microSD card gives the camera a fail-safe if the Ethernet connection to the NVR is ever interrupted, whether from a damaged cable, a pest, or a network switch going offline, since the camera keeps recording locally even when the NVR loses the feed.
The card also enables the built-in Time-Lapse feature, which on several Reolink cameras only compiles and saves to a microSD card rather than sending that footage to the NVR. In addition, running the NVR on continuous 24/7 recording while setting the microSD card to motion-triggered events only gives you a fast way to review specific incidents from the app without scrubbing through a full day of NVR footage.
See the Reolink 256GB microSD card on Amazon
Neither microSD nor NVR requires a subscription. If you are coming from a different Reolink model that does support cloud backup, our Reolink Cloud Plans Explained article breaks down what those plans add and the situations where paying makes sense, though it is worth knowing upfront that the option does not apply to the PoE or WiFi TrackMix.
Night Vision and Image Quality
Two night vision modes are available. Color night vision leans on the camera’s built-in spotlight, and once it kicks in, footage stays in full color rather than switching to the grainier black-and-white look most infrared cameras produce after dark. For situations where you would rather not run a spotlight, standard infrared night vision is also available and performs well within its expected range.
Daytime footage across both lenses is sharp, and the 6X hybrid zoom on the telephoto lens holds up better than we expected going in, particularly for identifying clothing or vehicle color at a distance rather than reading fine text or plates.
The footage below was recorded around 5 AM through our Reolink NVR and gives a much better idea of how the TrackMix handles a moving subject in real conditions. The fox crosses a large section of the yard while the camera detects it, follows it, zooms for a tighter view, and then returns toward its wider monitoring position.
Real-world Reolink TrackMix PoE footage recorded around 5 AM through our Reolink NVR, showing infrared night vision, motion tracking, and the dual-lens zoom following a fox across the yard.
Build Quality and Weight
We mentioned it above, but it is worth its own section: this is a heavy camera. The dual-lens housing, pan-tilt motor assembly, and weatherproof shell add up to noticeably more heft than a typical bullet or dome camera.
That extra weight is not a defect. It comes with the territory of packing two lenses and a full pan-tilt motor into one housing, but it does mean you should confirm your mounting surface and bracket hardware can support it long term, especially on siding or stucco rather than solid wood or masonry.
Our Reolink camera mount guide covers bracket and mounting options across the lineup if you want to double-check compatibility before you drill.
We mounted ours directly to vinyl siding without drilling, using a pair of no-hole vinyl siding clips attached to the upper two holes of the included bracket, then slid under the siding seam.
The install went about the same as our other Reolink wall mounts, and the clips have held the extra weight without any sag or shifting so far. If your home has vinyl or aluminum siding and you would rather not drill into it, this is a solid no-drill option worth considering before you commit to a masonry anchor setup.
Who Should Buy This Camera?
The Reolink TrackMix is a strong fit for a wide property where a single fixed-angle camera would leave gaps, especially if that property sees a mix of people, vehicles, and animals passing through. It is a poor fit for a narrow doorway or small room, where the tracking and zoom features add cost and complexity without much practical benefit over a simpler camera.
A strong fit if you:
- Need to cover a large yard, driveway, or property line from one mounting point
- Want reliable auto-tracking across a mix of subjects, not just one type
- Are comfortable choosing between WiFi and PoE based on your existing setup
- Want flexible, no-subscription local storage across microSD and NVR
- Do not mind mounting a heavier camera with the right bracket
Consider another camera if you:
- Only need to cover a narrow doorway or small indoor space, where our Reolink E1 Pro review covers a strong indoor pan-tilt alternative
- Want the lightest, simplest plug-and-mount camera available, closer to what our Reolink RLC-510A review covers
- Do not need active pan-tilt tracking and would rather have a fixed, ultra-wide dual-lens view, covered in our Reolink Argus 4 Pro review
- Have no interest in tuning tracking modes or timers to your yard
The Verdict
Reolink TrackMix: 4.5 / 5
The Reolink TrackMix delivers useful, dependable auto-tracking across a wide, mixed-traffic yard, accurate free AI detection, and flexible local storage across microSD and NVR, all without a required subscription. Digital Tracking First is the setting we would recommend to most buyers starting out, and a few minutes spent on the monitor point and auto-return timers makes a real difference in how well the camera performs day to day.
The extra weight, the learning curve around the tracking settings, and the lack of cloud backup on this hardware are the real tradeoffs, and none of them change our recommendation.
Frequently Asked Questions
Does the Reolink TrackMix require a subscription?
No. Person, vehicle, and pet detection all run for free through on-device AI, and local recording to microSD or an NVR requires no monthly fee. Reolink Cloud is not currently available on the PoE or WiFi TrackMix, only on the battery-powered version, so there is no subscription option to weigh either way.
What is the difference between the TrackMix WiFi and TrackMix PoE?
Both use the same dual-lens hardware, tracking modes, and detection features. The WiFi version connects over Wi-Fi 6 and still needs a wired DC power connection, while the PoE version draws both power and data from a single Ethernet cable, which requires a PoE-capable injector, switch, or NVR port.
Which tracking mode should I use?
Digital Tracking First is the best starting point for most yards, since it limits unnecessary motor movement while still catching subjects that move toward the edge of the frame. Pan/Tilt Tracking First works well for a single, predictable subject area, and Digital Tracking Only suits small, enclosed spaces.
Can I use a microSD card if the camera is connected to an NVR?
Yes. Adding a microSD card alongside an NVR gives the camera a local fail-safe if the network connection is ever interrupted, and it also enables the Time-Lapse feature, which requires a microSD card on several Reolink models.
For the full individual reviews, see the Reolink RLN8-410 NVR review and the Reolink Duo 3 PoE review. For brand-specific guides, see the Reolink camera reviews hub.