
In this hands-on Reolink RLN8-410 review, I break down what it is like to live with Reolink’s 8-channel PoE network video recorder (now also sold under the Reolink NVS8 name on current retail packages) as the local recording backbone of a subscription-free home security system. After running the RLN8-410 in my own home for several weeks with direct PoE cameras, LAN-connected PoE cameras, a wireless Reolink E1, and even a third-party Tapo camera over ONVIF, I have a clear picture of what this recorder does well, where initial setup requires patience, and how to get the sharpest playback from your recordings.
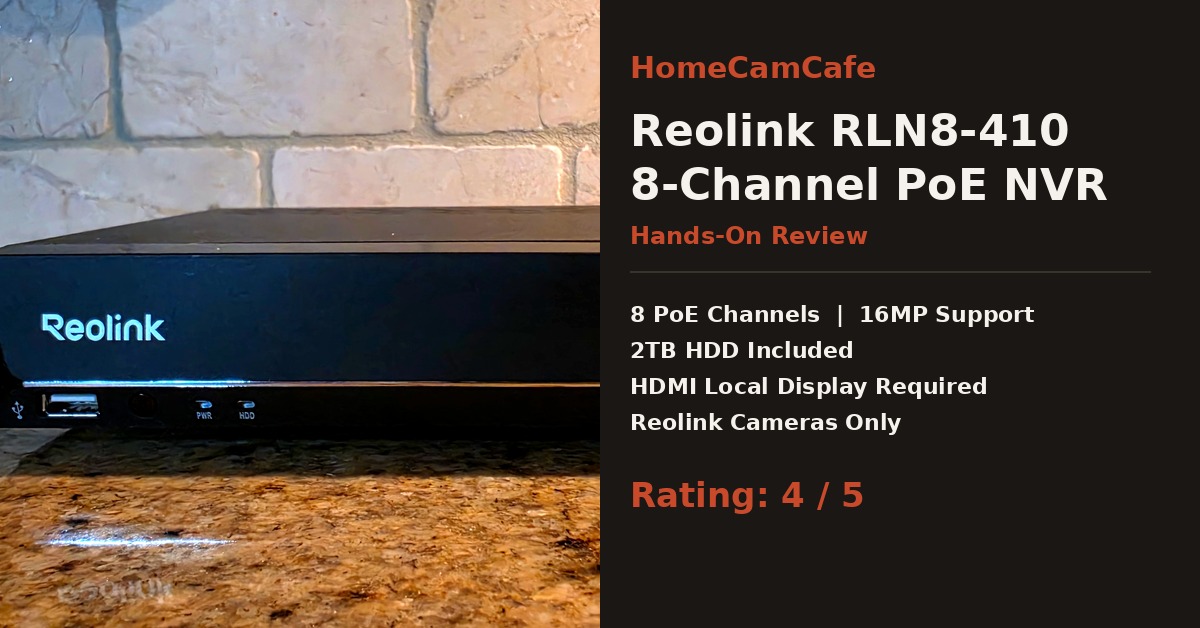
Quick Answer: The Reolink RLN8-410 (NVS8) is a dependable, subscription-free 8-channel PoE NVR with a pre-installed 2TB hard drive that excels when paired with native Reolink cameras. Its standout advantage is network flexibility: cameras do not all have to plug directly into the rear PoE ports, because the NVR can also discover and record Reolink PoE and Wi-Fi cameras connected elsewhere on your home LAN. Just be prepared to hook up an HDMI or VGA monitor and the included USB mouse for initial setup and deeper system configuration, as it is not an app-only appliance.
Check Reolink RLN8-410 Price on Amazon →
Reolink RLN8-410 Review: Key Specifications (NVS8 / N7MB01)
Because Reolink has kept the RLN8-410 model number in production across several hardware generations while introducing the NVS8 retail label, checking the underlying specifications and hardware version is important before buying cameras or extra storage drives.
| Specification | Reolink RLN8-410 / NVS8 (Current N7MB01 Hardware) |
|---|---|
| Rear PoE Camera Ports | 8x RJ-45 10/100 Mbps IEEE 802.3af/at PoE ports (up to 25W per port) |
| Total Camera Channels | 8 wired PoE or plug-in Wi-Fi channels (up to 12 total channels on N7MB01 when adding up to 4 compatible battery cameras over LAN) |
| Supported Camera Resolutions | Up to 16MP, 12MP, 4K (8MP), 5MP, and 4MP Reolink IP cameras |
| Pre-Installed Storage | 2TB 3.5-inch SATA surveillance hard drive included (diskless RLN8-410-NHD variant also sold) |
| Maximum Storage Upgrade | Up to 12TB to 16TB total (1x internal SATA bay up to 6TB or 8TB + 1x external eSATA drive up to 6TB or 8TB, depending on hardware revision) |
| Video & Audio Outputs | 1x HDMI port (up to 4K 3840×2160), 1x VGA port (up to 1080p), 1x RCA audio out |
| Network & USB Ports | 1x RJ-45 10/100 Mbps LAN/WAN router port, 2x USB 2.0 ports (mouse and USB flash drive export) |
| Video Compression | H.265 / H.264 |
| Initial Setup Requirement | Requires connecting a television or monitor (HDMI/VGA) and USB mouse |
| Dimensions & Weight | 260 x 41 x 230 mm (10.24 x 1.61 x 9.06 in) / Approx. 1.2 kg to 1.4 kg (with HDD) |
| Monthly Subscription Required | None (100% local recording and free remote mobile/desktop viewing) |
Is the Reolink NVS8 the Same as the RLN8-410?
This naming overlap is more confusing than it needs to be because Reolink has used the RLN8-410 model number across multiple hardware generations for years, while newer retail packaging, bundle kits, and support documents increasingly use the Reolink NVS8 name.
For shoppers buying new Reolink hardware today, the two names refer to the same current 8-channel PoE NVR platform. Reolink’s current RLN8-410 and NVS8 units run on hardware version N7MB01 and include eight built-in PoE ports on the rear panel. With current firmware installed, the N7MB01 hardware supports up to 12 IP cameras in total: up to eight wired PoE or plug-in Wi-Fi cameras, plus up to four compatible Reolink battery or solar Wi-Fi cameras connected over the local network.
That hardware version distinction matters if you are buying a used recorder or upgrading an existing system. Older RLN8-410 hardware revisions (such as H3MB02, H3MB18, N2MB02, or N3MB01) have lower maximum camera resolution caps (often 4MP, 5MP, or 8MP instead of 12MP and 16MP), smaller hard drive size limits, and different firmware files on Reolink’s download center. If you already own an RLN8-410, always check the hardware version listed under the system information screen before assuming every feature or firmware update listed for a current NVS8 applies to your unit.
Throughout this review, I share my hands-on testing with the RLN8-410 while referencing NVS8 terminology where it helps buyers match Reolink’s current retail listings.
What Is in the Box and Physical Design
The RLN8-410 ships with everything required to get the recorder powered up and connected to a display. My box included the RLN8-410 NVR with the 2TB hard drive pre-installed, a 48V DC power adapter and cord, a 1-meter Cat5e Ethernet patch cable for linking the NVR to a router, an HDMI cable, a wired USB mouse for navigating the local screen interface, and a quick-start booklet.
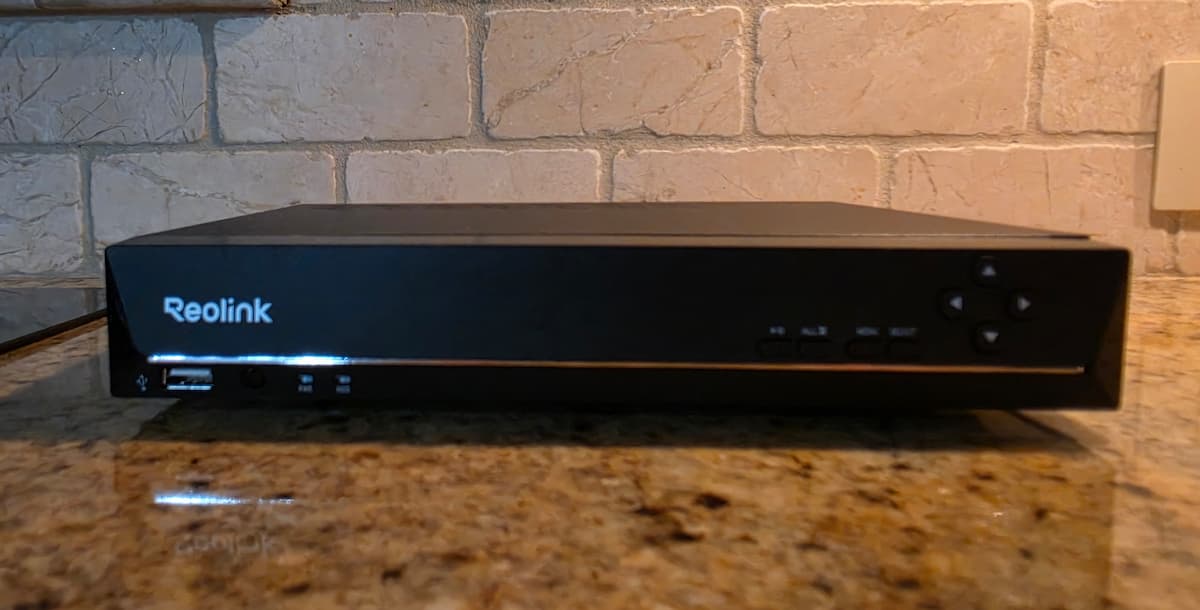
Having the HDMI cable, Ethernet jumper, and USB mouse in the box means you do not have to raid a spare parts drawer before starting installation. None of the included accessories feel fancy, and the lightweight plastic mouse is basic, but every piece worked properly right out of the box.
Physically, the RLN8-410 is compact and unassuming. At roughly 10.2 inches wide and 1.6 inches tall, it looks like a slim black cable television box or small network switch. It is designed to sit quietly on a shelf near a television, desktop monitor, or network rack rather than stand out in a living space.
Reolink RLN8-410 Setup and Local UI Configuration
The single most important operational detail to understand before buying a Reolink RLN8-410 or NVS8 is that full system setup is not handled entirely through the Reolink smartphone app.
Unlike modern wireless camera hubs that pair by scanning a QR code on your phone, the RLN8-410 requires a direct monitor and mouse connection for initialization. I connected mine via HDMI to a television and plugged the included USB mouse into the front USB port to walk through the startup wizard, create the administrator password, verify the 2TB hard drive, and configure basic network settings.
Once that initial monitor setup was finished, everyday live viewing, event notifications, and timeline playback worked smoothly through the Reolink mobile app on my phone and tablet, as well as the Reolink Desktop Client on a computer.
Deeper administrative configuration is another matter. Certain NVR-level settings, including channel management, manual network camera IP additions, storage formatting, firmware maintenance, and specific recording schedules, are either much easier to adjust or strictly required on the NVR’s local television/monitor interface.
Setup Tip: Plan to place the RLN8-410 or NVS8 within reach of a television or computer monitor during initial installation, or keep a small spare HDMI monitor handy in your network closet. Do not buy a traditional PoE NVR expecting a 100% phone-only setup process.
The Documentation and Manual Could Be Better
The weakest part of my initial experience with the RLN8-410 was the included documentation. It is easy to see why so many owners search online for a fuller Reolink RLN8-410 manual after opening the box.
The printed quick-start guide covers physical cable connections and basic startup, but it leaves out many of the practical details a first-time NVR owner encounters once cameras are connected and recording. I ended up learning several key features simply by clicking through the local menus, comparing the mobile app against the HDMI interface, and testing different camera configurations myself.
Reolink’s online support articles fill in many of those blanks if you know what terms to search for, but the in-box guide could do a far better job explaining how LAN camera discovery, continuous versus motion recording schedules, alarm playback filters, and stream quality toggles interact.
Adding Reolink Cameras to the RLN8-410 or NVS8
Camera compatibility and wiring flexibility are where the RLN8-410 really won me over during testing. If you are using Reolink cameras, they do not all have to be physically plugged into the eight PoE ports on the back of the NVR.
As long as the RLN8-410’s LAN port is connected by Ethernet to your home router, the recorder can scan your local home network and pull in Reolink cameras located anywhere on that same LAN. During my testing, I verified three different connection methods:
- Direct Rear PoE Connection: Plugging a Reolink PoE camera directly into one of the eight rear PoE ports supplies both 802.3af/at electrical power and video transmission over a single Ethernet cable.
- LAN-Connected PoE Camera via Separate Injector: I tested a Reolink PoE camera powered through a standalone PoE injector elsewhere on my home network. Instead of running a dedicated Ethernet cable all the way back to the NVR, the camera communicated over my existing home LAN, and the RLN8-410 discovered and added it during a network scan without a hitch.
- Wireless Reolink Camera Over Wi-Fi: I also added a wireless Reolink E1 indoor pan-and-tilt camera over my home Wi-Fi network (see my Reolink E1 Pro review for how Reolink’s indoor pan-tilt cameras perform).
That network flexibility is a major real-world advantage if your NVR sits near a television on one side of the house and pulling every single exterior Ethernet cable directly to that room would be difficult. For a step-by-step walkthrough of how this works in the menus, see my full guide on how to add a camera to a Reolink NVR.
Direct PoE Ports vs Network-Connected Cameras: Why It Matters
Understanding the difference between a direct NVR PoE connection and a LAN connection before you pull cables can save headaches later, because the two wiring methods change how your cameras appear in the Reolink app and on your home network.
Direct PoE connection (Rear NVR Ports 1 to 8): When a camera plugs straight into one of the RLN8-410’s rear PoE ports, the NVR places that camera on its own internal private subnet. You access and manage the camera through the NVR channel rather than as a separate standalone device on your regular home Wi-Fi router.
Network connection (Separate PoE Switch, Injector, or Wi-Fi): When a camera receives power from a separate PoE switch, a standalone PoE injector, or a wall outlet and connects to your home router or mesh network, it exists as an independent device on your home LAN while simultaneously sending its video stream to the RLN8-410 for 24/7 hard-drive recording. That means the camera can keep its own internal microSD card as a secondary backup and appear both as a standalone camera and inside the NVR channel list.
Also note that the eight rear PoE ports and the LAN port on the RLN8-410 use 10/100 Mbps Fast Ethernet interfaces rather than Gigabit ports. Because a 4K, 12MP, or 16MP Reolink camera stream typically uses between 4 Mbps and 10 Mbps of bandwidth, 100 Mbps handles eight cameras without bottlenecking recording, though it is worth knowing for network planning.
Using Third-Party Cameras With the Reolink NVR (ONVIF Tested)
Because my home security camera setup is not 100% Reolink, one of my main goals for this review was testing how the RLN8-410 handles third-party cameras over ONVIF.
I added our dual-lens TP-Link Tapo C575D PoE camera to the RLN8-410 using ONVIF over the local network. It connected and recorded video to the NVR hard drive, but there is an important limitation every buyer should know.
Connecting a third-party ONVIF camera is not the same thing as getting full native Reolink functionality.
While the Tapo C575D delivered its video stream to the RLN8-410 for continuous recording, smart AI person/vehicle/pet detection tags, custom alert triggers, two-way audio, and advanced playback filtering were much more limited than what you get with a native Reolink camera like the Reolink Duo 3 PoE, Reolink RLC-1212A, or Reolink RLC-510A.
For that reason, I treat ONVIF support on the RLN8-410 as a helpful bonus for pulling one or two secondary cameras into your 24/7 recording timeline rather than a reason to buy a Reolink NVR for a heavily mixed-brand camera system. If most of your cameras are Reolink, the RLN8-410 makes total sense. If your cameras come from three or four different brands, a dedicated multi-brand VMS (like Blue Iris, Synology Surveillance Station, or Frigate) is a better fit.
Continuous 24/7 Recording and Alarm Motion Playback
The primary reason to step up to a hard-drive NVR instead of relying strictly on in-camera microSD cards or cloud clips is uninterrupted 24/7 continuous recording. If a motion sensor triggers a second too late or cuts off early, a 24/7 NVR timeline still has the entire event before and after the alert.
The RLN8-410 handles continuous recording reliably, and its playback interface includes an Alarm Only (and smart Person/Vehicle/Animal) filter that highlights motion events directly inside the 24/7 timeline. That saves a tremendous amount of time when you know something happened in the driveway overnight and do not want to scrub manually through eight hours of empty video.
There is one critical setting to watch during setup: motion and smart detection must still be enabled on the camera channel if you want those event markers indexed on the timeline. Setting a channel to record 24/7 continuously does not automatically tag motion events for filtering unless motion detection is active alongside continuous recording.
Playback Quality and Digital Zoom: Fluent vs Clear Streams
When reviewing recorded video from the RLN8-410 inside the Reolink mobile app, playback sharpness depends heavily on which stream profile is selected at the bottom of the player.
By default, the Reolink app often opens multi-camera views or remote playback in the lower-bandwidth Fluent substream so the timeline loads quickly and scrubs smoothly over Wi-Fi or cellular data. Fluent mode is fine for checking whether a delivery truck arrived, but it looks soft and blocky the moment you pinch to zoom in on a distant detail.
When I zoomed into recorded footage on the RLN8-410 while the player was set to Fluent, fine detail softened noticeably. Tapping the stream selector and switching playback to Clear forces the app to pull the full-resolution main stream from the NVR hard drive, which made a dramatic difference in sharpness. Always switch to Clear before judging whether a camera captured a face, vehicle, or license plate.
RLN8-410 Storage Retention and Hard Drive Upgrades
My RLN8-410 arrived with a 2TB 3.5-inch surveillance hard drive pre-installed, so the recorder was ready to store video immediately without opening the metal case. How many days of history that 2TB drive holds depends on your camera resolutions, bitrates, frame rates, and whether you record 24/7 or only on motion:
- Four 5MP or 4K cameras recording 24/7 at default bitrates (4096 to 6144 Kbps with H.265 compression) typically retain roughly 9 to 14 days of continuous loop history on a 2TB drive before overwriting the oldest footage.
- Eight 4K or 12MP cameras recording 24/7 around the clock will cycle through a 2TB drive in roughly 4 to 6 days.
- Motion-only scheduled recording or lower daytime/nighttime bitrates can stretch that same 2TB drive across several weeks or months.
If you want longer 24/7 retention, the RLN8-410 supports two upgrade paths. First, you can open the chassis and swap the internal 2TB 3.5-inch SATA drive for a larger surveillance-grade drive (such as a Western Digital Purple or Seagate SkyHawk). Second, the rear panel includes an eSATA port for attaching an external eSATA hard drive enclosure. Current N7MB01 units support up to 6TB or 8TB per bay (12TB to 16TB combined across internal SATA + external eSATA, depending on exact firmware), while older hardware revisions cap out at 4TB per drive. Check your unit’s hardware version screen before ordering an upgrade drive.
If you already know you will be running more than eight wired cameras or want two internal hard drive bays (with 4TB pre-installed out of the box) without using an external eSATA enclosure, consider stepping up to the 16-channel Reolink RLN16-410 PoE NVR.
What I Like and What Could Be Better
What I Like About the Reolink RLN8-410 / NVS8
- Zero mandatory subscription fees: All 24/7 continuous recording, AI event tags, and remote mobile viewing stay local on your hardware.
- Excellent native Reolink camera integration: Plug-and-play PoE power and full smart detection support with Reolink cameras up to 16MP.
- LAN camera discovery beyond the rear ports: Reolink PoE cameras on separate injectors/switches and Reolink Wi-Fi cameras on your home network can be added over the LAN without running every cable directly to the NVR.
- 2TB hard drive and accessories included: Ships with the hard drive installed plus the HDMI cable, Ethernet cord, and USB mouse in the box.
- Fast Alarm Only timeline filtering: Isolates person, vehicle, animal, and motion events inside a 24/7 recording timeline.
- Bonus ONVIF third-party camera support: Can record basic video streams from ONVIF-compatible cameras like our Tapo C575D.
What Could Be Better
- Requires a monitor and USB mouse for initial setup: You cannot initialize the NVR or access every deep system setting from the smartphone app alone.
- Sparse printed documentation: The in-box quick-start guide leaves out key networking, schedule, and playback filter explanations.
- Limited third-party ONVIF feature parity: Third-party ONVIF cameras record video, but smart AI detection tags and advanced controls do not carry over the way they do on native Reolink cameras.
- Multiple hardware revisions under one name: Buyers have to verify whether a listing is the current N7MB01/NVS8 generation or an older hardware revision.
Who Should Buy the Reolink RLN8-410 (And Who Should Get a Home Hub Instead)
The Reolink RLN8-410 / NVS8 makes the most sense for a homeowner who is building primarily around the Reolink ecosystem and wants 24/7 continuous local hard-drive recording without recurring cloud bills. It is the right pick if you are running Ethernet cables for two to eight PoE cameras (or mixing PoE cameras with a couple of Reolink Wi-Fi cameras over your home network) and want the NVR to supply PoE power straight from its back panel.
It makes less sense if you refuse to connect a television or monitor for initial setup, if you only use battery/solar cameras, or if you plan to build a system from four different camera brands.
Want a 100% App-Only Setup Without a Monitor or Mouse? If your system uses Reolink battery, solar, or Wi-Fi cameras and you want headless phone-only setup, a built-in indoor chime and security siren, and AES-128 encrypted storage, read my full Reolink Home Hub vs NVR comparison before ordering.
Frequently Asked Questions
Can I set up the Reolink RLN8-410 without a monitor or TV?
No. For initial out-of-the-box setup, you must connect the RLN8-410 to a television or monitor via HDMI or VGA and use the included USB mouse to create your administrator password and initialize the system. Once initial setup is complete, day-to-day live viewing and playback work through the Reolink mobile app and desktop client.
Do all cameras have to plug directly into the back of the RLN8-410?
No. While the RLN8-410 has eight built-in PoE ports on the rear panel, any compatible Reolink PoE camera (powered by a separate PoE injector or switch) or Reolink Wi-Fi camera connected to the same home router network as the NVR’s LAN port can be discovered and recorded over your local network.
Does the Reolink RLN8-410 work with third-party ONVIF cameras?
Yes, with limitations. In my testing, I connected a TP-Link Tapo C575D camera to the RLN8-410 using ONVIF. The NVR recorded the video stream properly, but brand-specific smart AI detections, custom alerts, and certain playback features do not carry over the way they do with native Reolink cameras.
Does the Reolink RLN8-410 make noise while running?
Because the RLN8-410 houses a spinning 3.5-inch mechanical surveillance hard drive and a small internal cooling fan inside a metal chassis, it produces a low, steady hum. It is quiet enough for a network closet, office corner, or media cabinet, though light sleepers may not want it on a bedroom nightstand.
Reolink RLN8-410 / NVS8 Review Verdict — Rating: 4.0 / 5.0
The Reolink RLN8-410 (NVS8) is at its best as the anchor of a Reolink camera system. It delivers dependable 24/7 local hard-drive recording, eliminates monthly cloud fees, and offers far better network flexibility than its row of eight rear PoE ports might suggest. Being able to discover and record Reolink cameras connected elsewhere on the home LAN is one of its strongest real-world perks. While thin printed documentation, limited third-party ONVIF smart features, and the mandatory monitor-and-mouse setup keep it from a perfect score, it remains a rock-solid PoE NVR for any primarily Reolink home installation.
View Reolink RLN8-410 (8-Ch PoE NVR) on Amazon →
View Reolink RLN16-410 (16-Ch PoE NVR) on Amazon →
For more hands-on camera testing and setup guides, see my how to add a camera to a Reolink NVR guide, Reolink Duo 3 PoE review, Reolink RLC-1212A review, Reolink RLC-510A review, Reolink E1 Pro review, and Tapo C575D review.
You can also compare Reolink’s storage options in my Reolink Home Hub vs NVR guide, browse the Reolink camera reviews hub, or check my complete PoE security cameras guide.