 A common challenge with any security camera is the ability to see as much as possible as clearly as you can. On some cameras, the view is what it is. Not so on a Nest Cam or DropCam Pro. We’ll show how to see further on a Nest Cam or DropCam Pro and see it more clearly. A few undocumented tips and tricks combined with our experience should help.
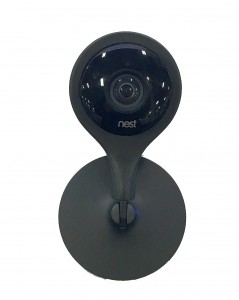
Everything we discuss will work on a Nest Cam and DropCam Pro. Both models share the same app and the few accessory recommendations work well with either camera.
A Nest Cam and DropCam Pro have a very wide 130 degree field of view. That’s typically enough so that you can see an entire room when the camera is placed on a corner shelf.
This brings us to our first tip. Put the camera in a corner. This enables you to get a view of the entire room. Angle it properly and this might be the only camera you need for monitoring your home.
Don’t have a corner shelf? Consider the VuSee – The Universal Baby Monitor Shelf. This accessory is marketed for placing a baby camera in the corner of a room. These will also accommodate a Nest Cam or DropCam Pro. No holes necessary. Adhesive strips are included for attaching the shelf to a corner of the room. You can attach your Nest Cam using the tripod camera hole that is exposed after you remove the stand. An adapter would be used for the DropCam Pro which is included with the shelf. This works fine on painted walls but not those with wall paper.
A second tip for seeing further and more clearly on any security camera including a Nest Cam is to ensure the image quality is cranked up as high as possible. That means pushing the image quality toggle all the way up to 1080p. After doing that, your Nest Cam will need to reset itself momentarily. When it comes back, you will be able to see further and more clearly.
During the day, a Nest Cam can see as well as a person with normal vision. Often you will find the need to zoom in on an object. That’s done via pinch and zoom on a smartphone and using the plus sign on the desktop. The problem though is the resulting image can be fuzzy. That’s because the software still thinks it’s seeing things at a distance.
Here’s how to see further and get a clearer image after zooming in on a Nest Cam or DropCam Pro. Located in the lower left corner is a plus sign in brackets. Tap it to activate the digital zooming feature. When done looking at the zoom, and you want to get it back to normal, tap the minus sign in brackets that’s now located at the lower left corner. Important to note is that if you have a Nest Aware subscription, only the zoomed-in area is recorded. So what you see in the app is what is being recorded.
At night, the Nest Cam and DropCam Pro can see further than you. Thanks to the infrared lights featured on both models, you should be able to see up to 20 feet in the dark. The 20 feet is for pitch dark environments. Added light can potentially increase that distance.
From personal experience, I recommend having night vision activated when using the camera indoors. To see further outdoors, I like to turn night vision off and light up the area or if you planned it right, use the patio light that’s already on.
Want to have super hero type vision at night? Consider adding an external IR light such as the Univivi IR Illuminator 90 Degree Wide Angle 8-Leds IR Infrared Light. External IR lights are especially useful when using a Nest Cam through a window. Adding a strong IR light such as this can extend your night vision to 85 feet.
Obviously, our tips for using the Nest App most effectively apply only to a Nest Cam or DropCam Pro. However other tips we discussed can be applied to other brands of home security cameras as well.